预览图
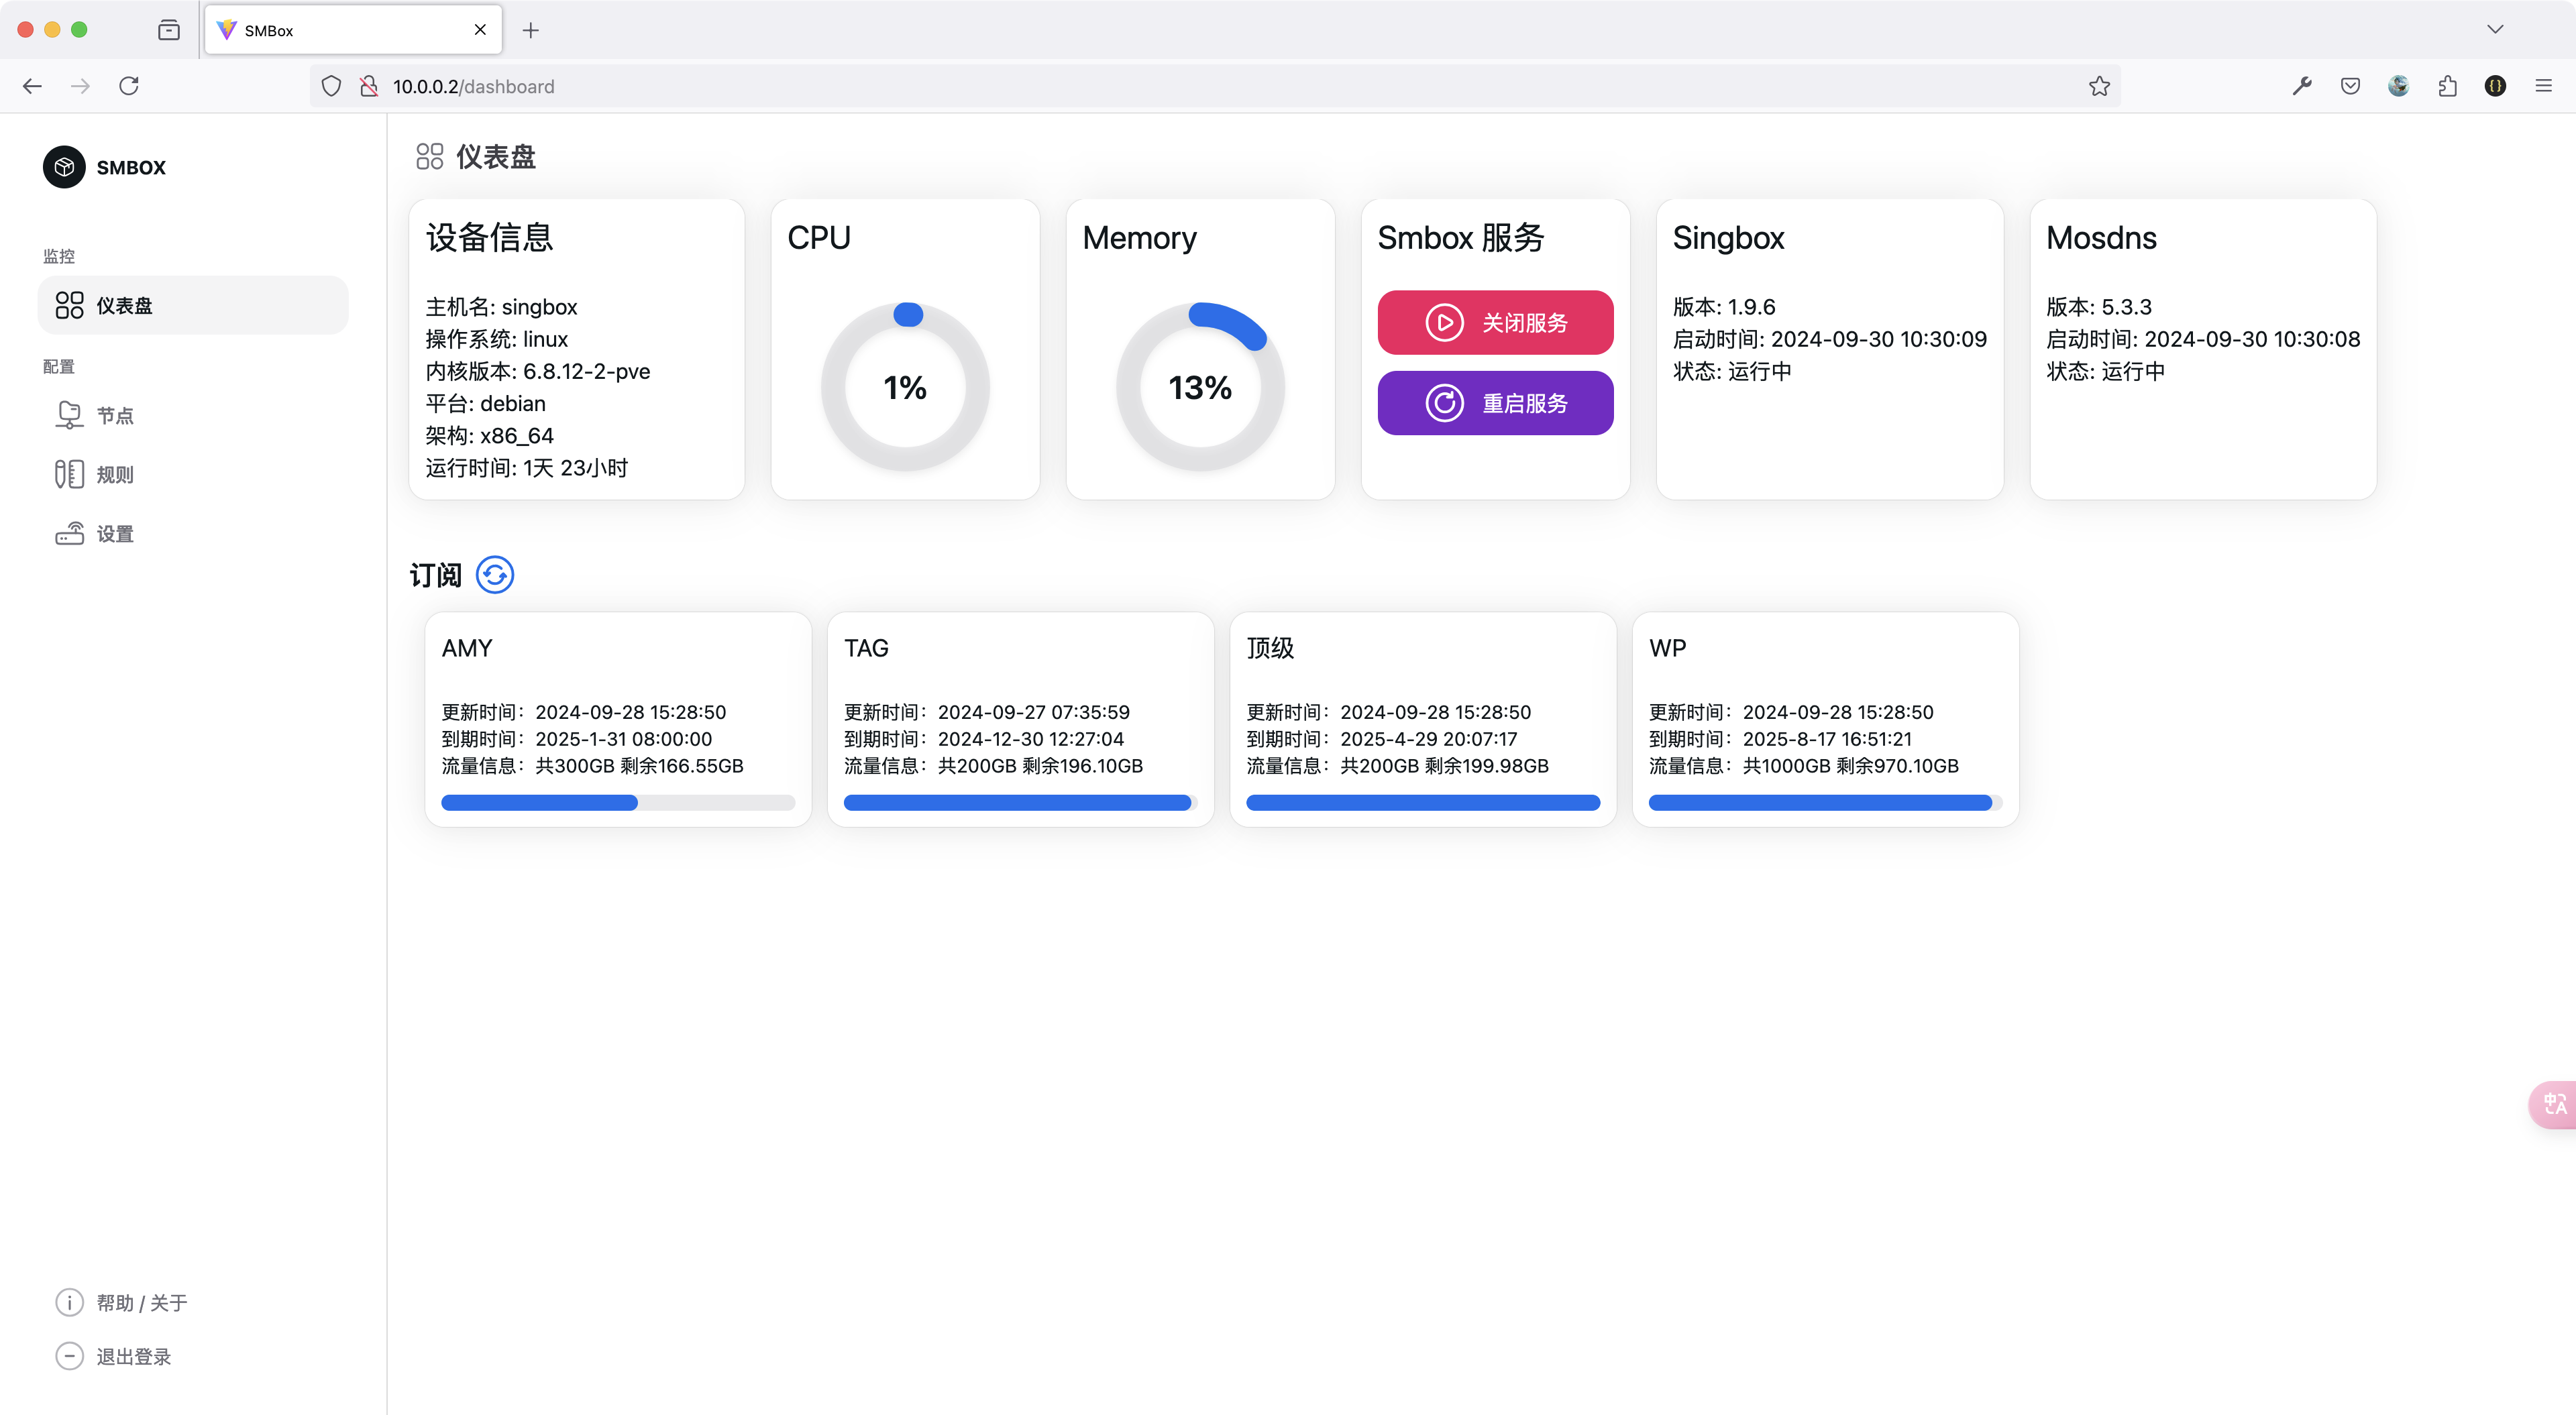
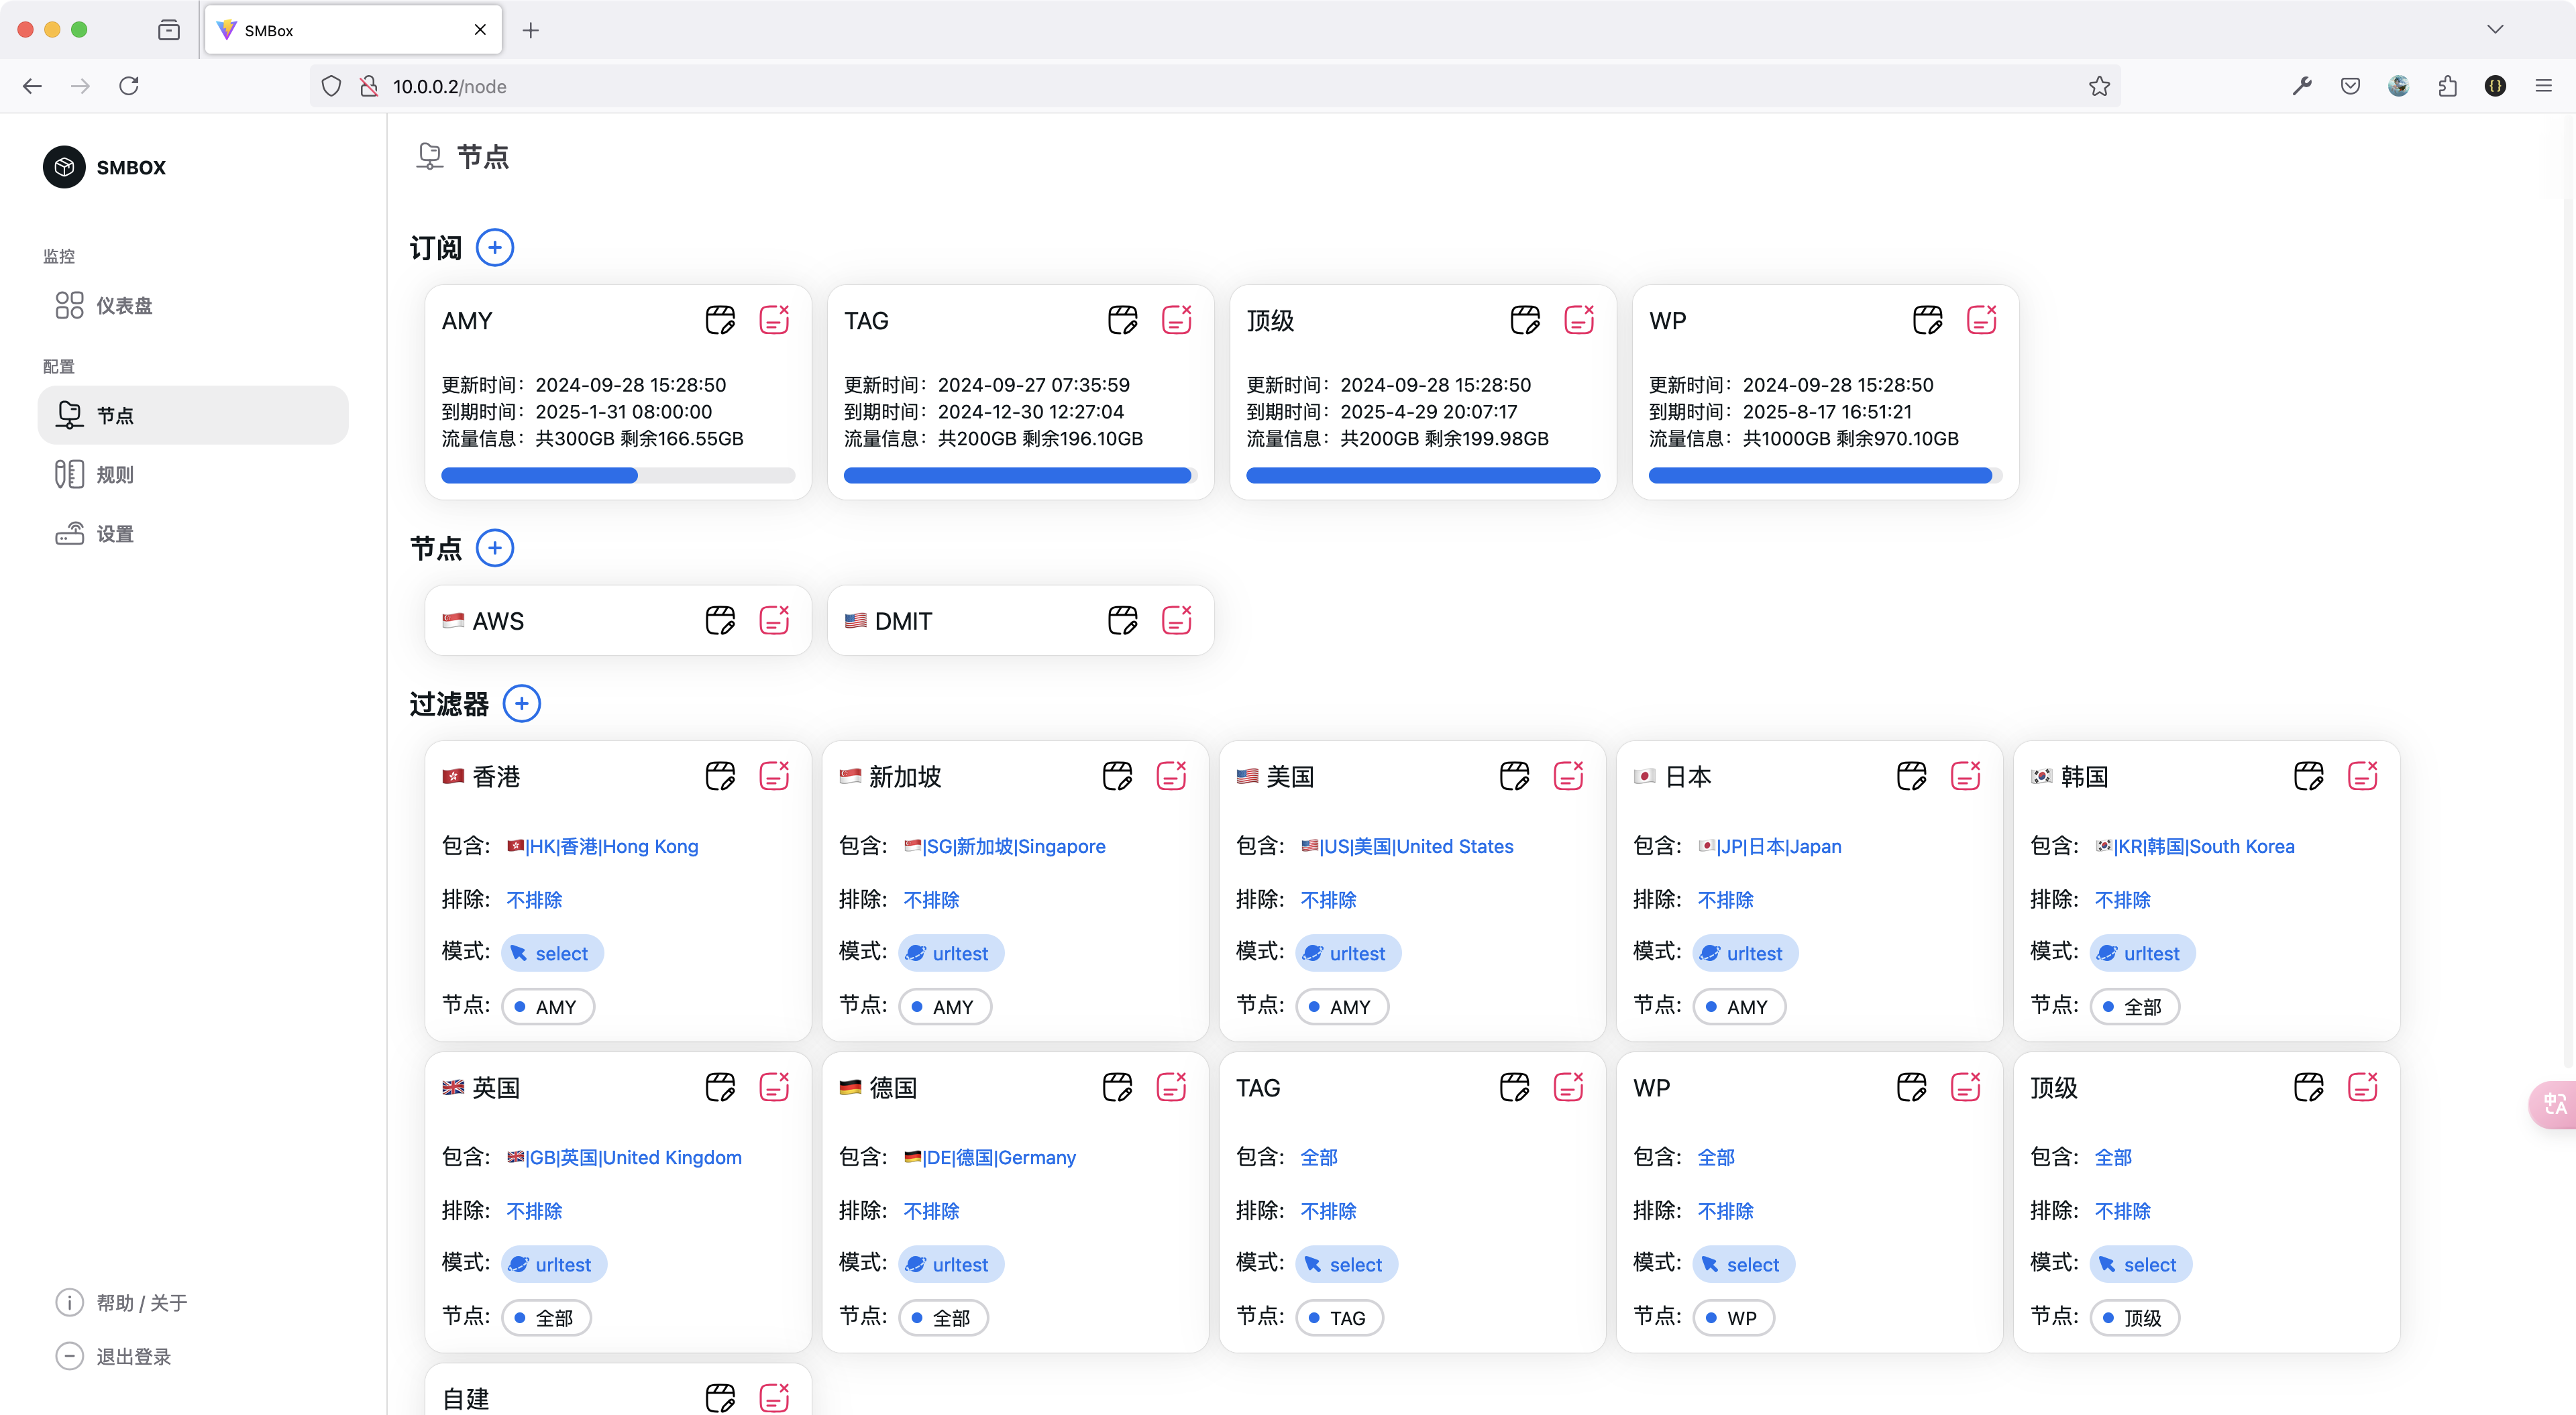

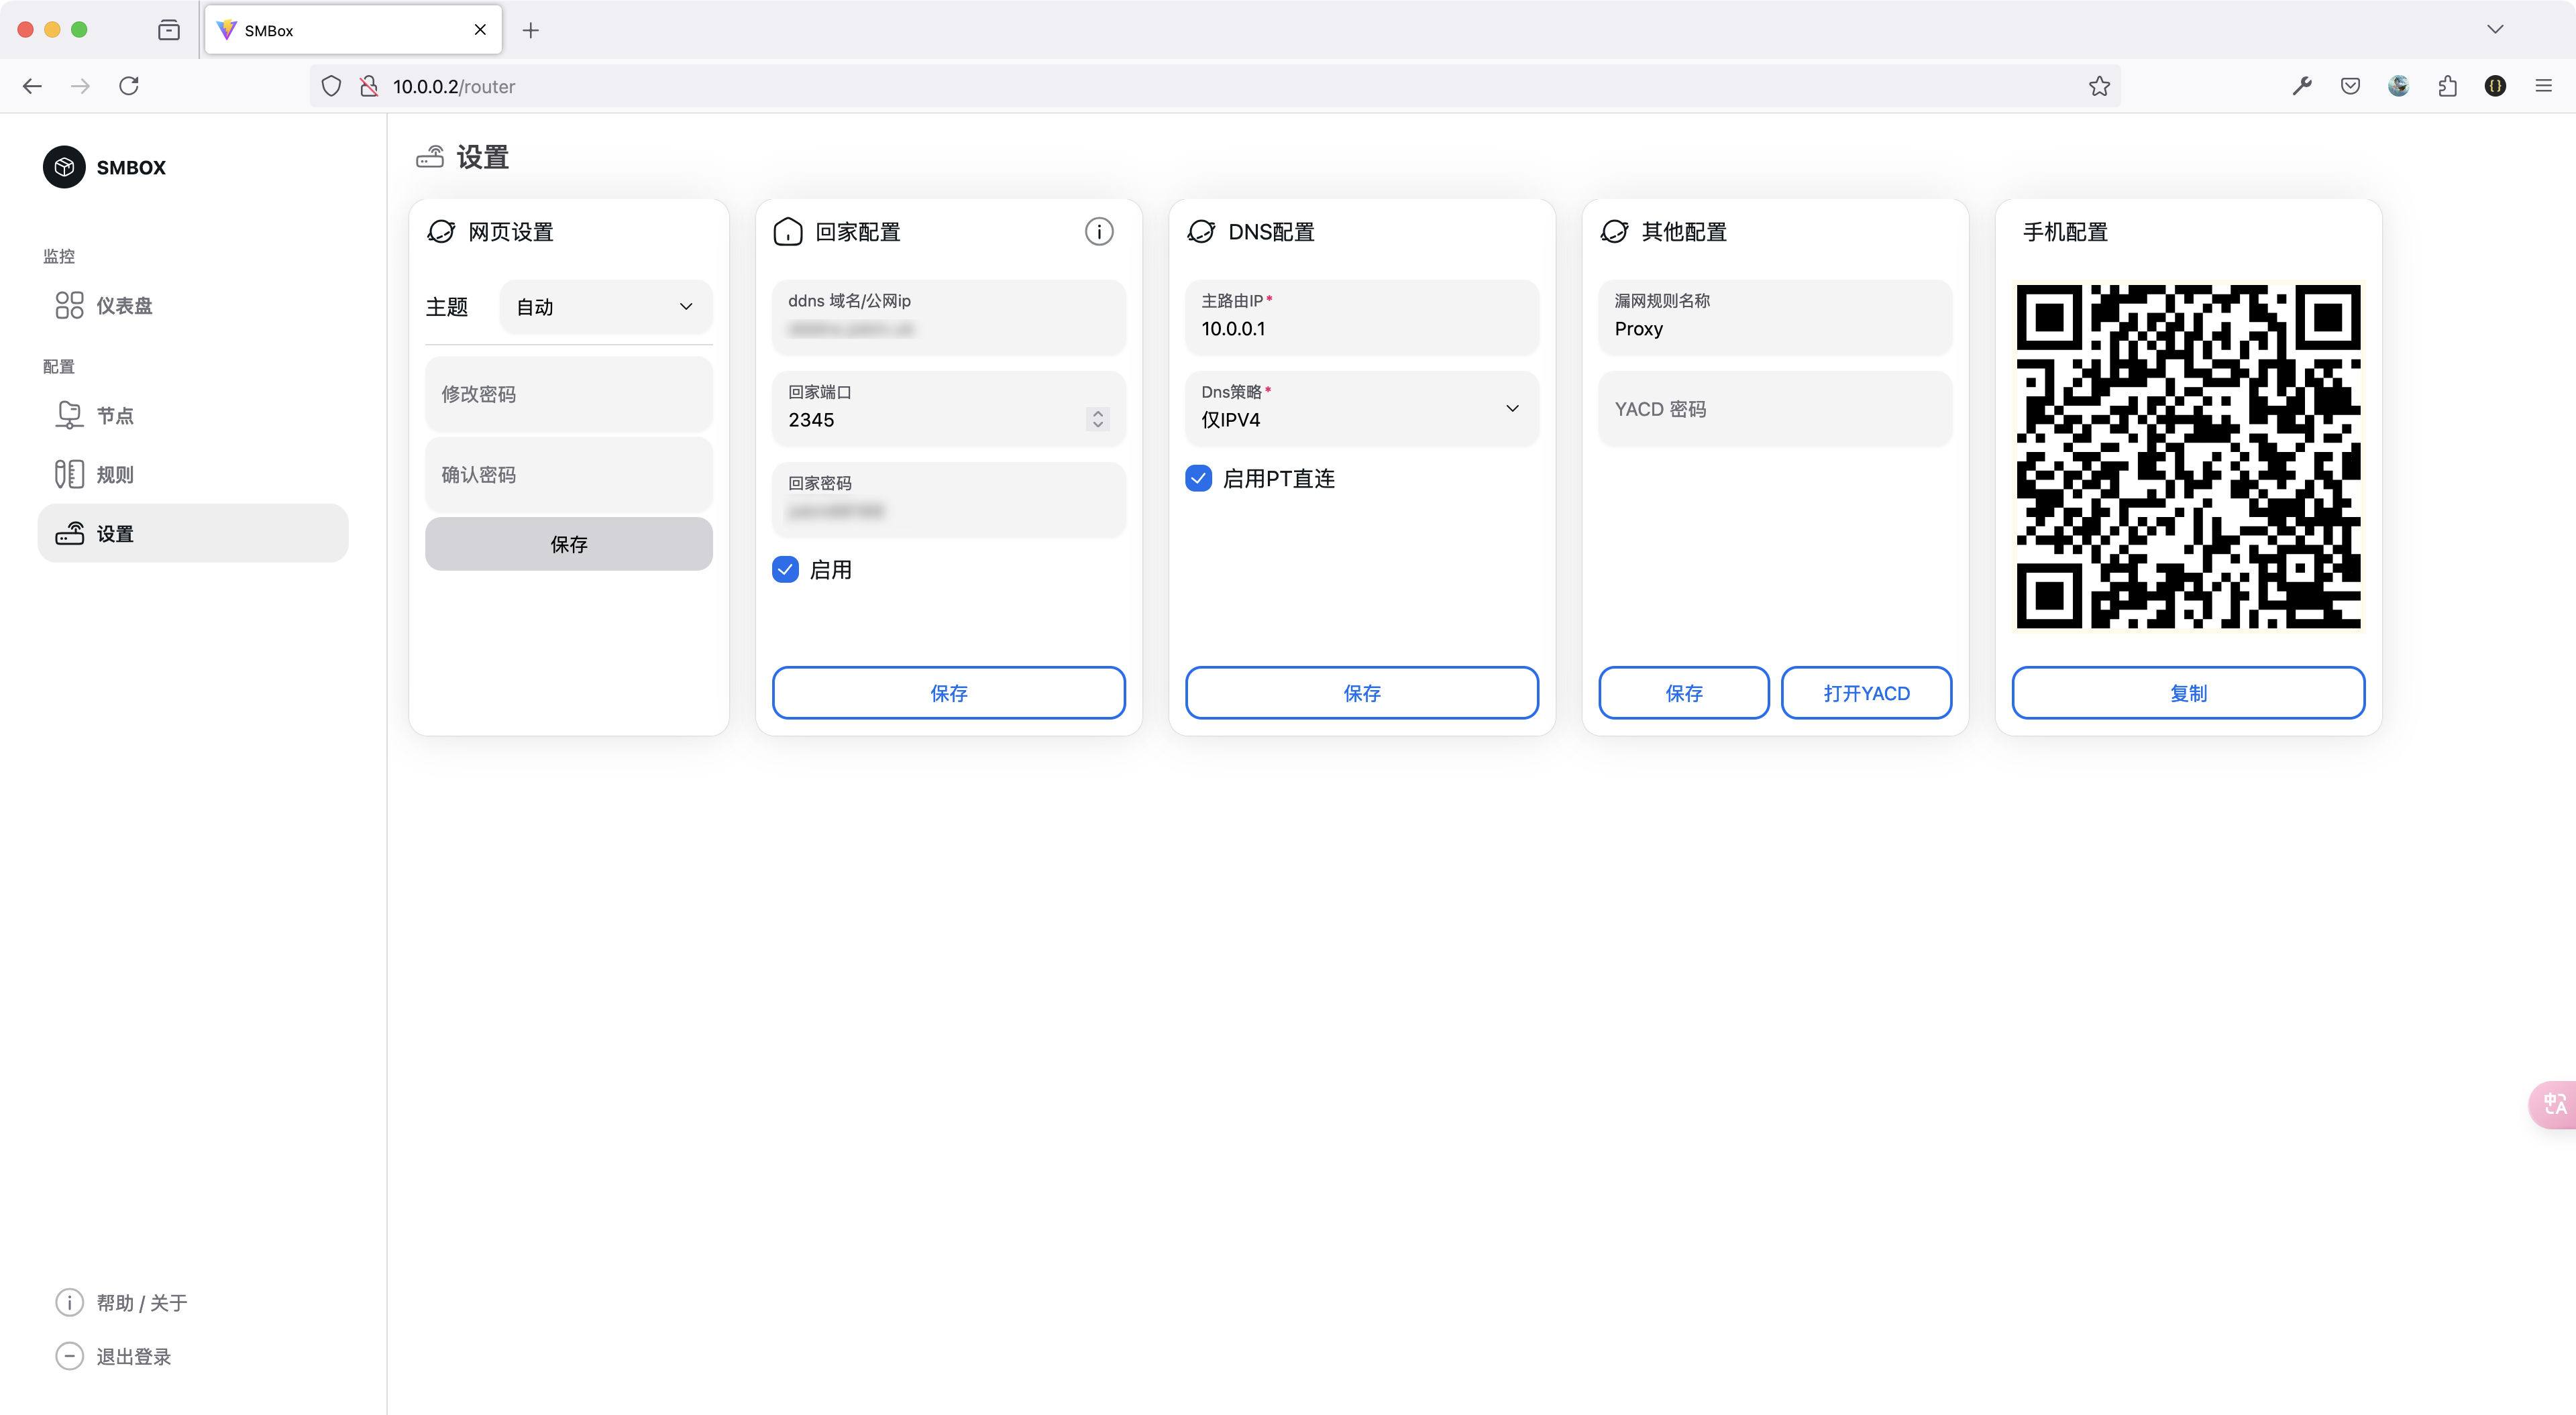
目前仅赞助人员可用
赞助链接: https://buzheteng.org/archives/18.html
支持系统
linux的arm64、amd64、armv7以及
容器的arm64、amd64、armv7
debian安装步骤
- 使用群内一键脚本安装
- 最好使用debian/LXC Debian
- ubuntu 安装完要自行重启
容器安装步骤
- 增加veth网卡
- 把网卡加到bridge
- 去群里下载对应系统的容器包,并上传
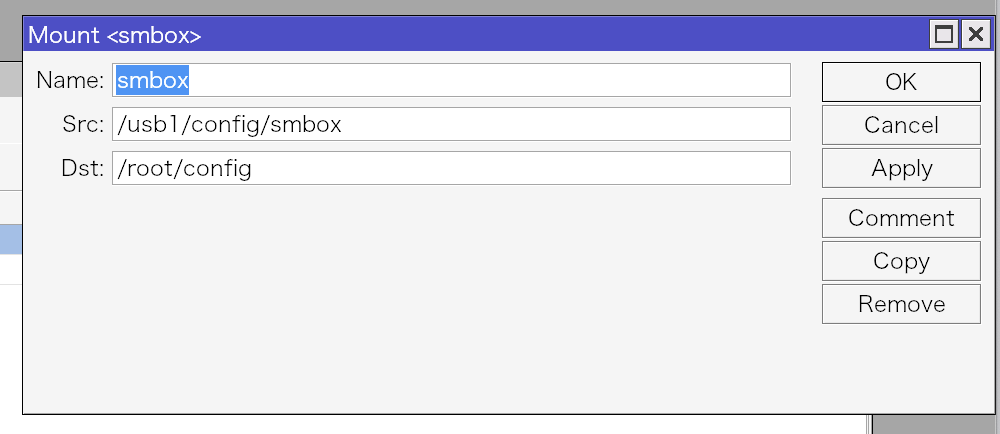
- 添加mounts,会在此处保存smbox的数据库文件,方便后续升级
- 添加容器
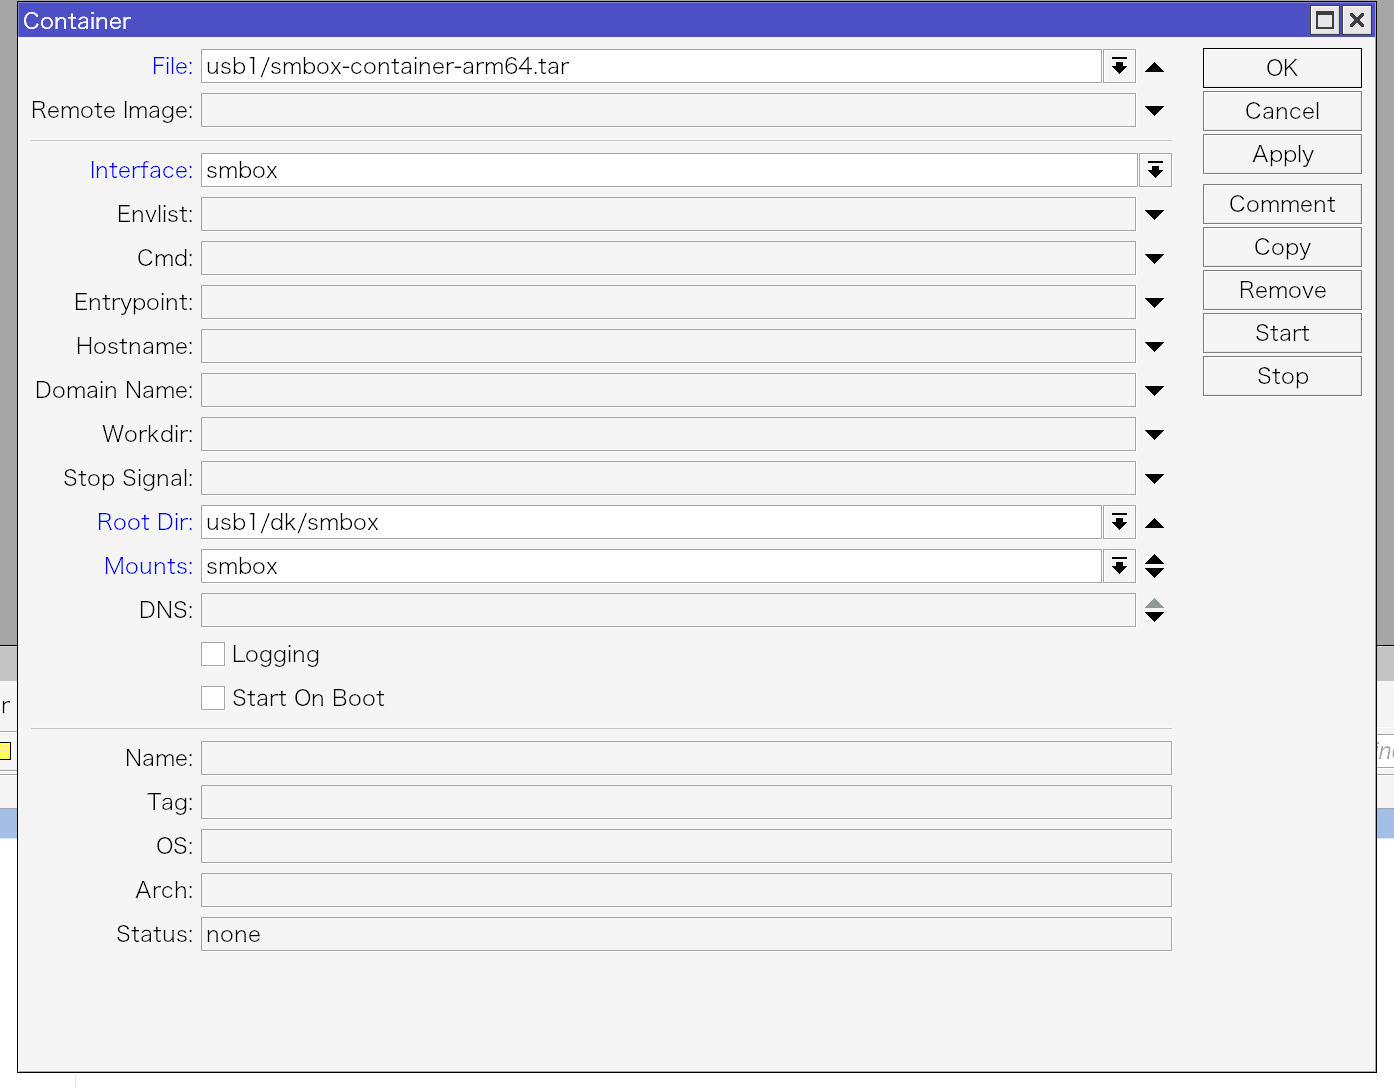
如果没有usb的话root dir可以不填,apply一下就安装成功了,点击start,在浏览器打开veth的ip即可
使用教程
- 打开web页面
- 点击节点页面
- 添加节点/订阅,此处和UPCG一致,最好是小火箭协议的,或者Clash目前支持SS、Vmess、Vless、Trojan
- 点击设置页面,输入主路由ip,选择dns策略,最好是仅ipv4,此处设置的是singbox的,纯v6网站mosdns还是可以正常访问的
- 点击dns配置那里的保存
路由器配置
ROS
/ip firewall address-list
add address=91.108.56.0/22 list=proxy_cidr
add address=91.108.4.0/22 list=proxy_cidr
add address=91.108.8.0/22 list=proxy_cidr
add address=91.108.16.0/22 list=proxy_cidr
add address=91.108.12.0/22 list=proxy_cidr
add address=149.154.160.0/20 list=proxy_cidr
add address=91.105.192.0/23 list=proxy_cidr
add address=91.108.20.0/22 list=proxy_cidr
add address=185.76.151.0/24 list=proxy_cidr
add address=198.18.0.0/15 list=proxy_cidr
下方10.0.0.2要改为你自己smbox的ip
10.0.0.1改为自己路由器的ip
10.0.0.0/24改为你自己的网段
/routing/table/add name=proxy fib
/ip/route/add gateway=10.0.0.2 routing-table=proxy comment=proxy_route
/ip/firewall/mangle/add chain=prerouting dst-address-list=proxy_cidr action=mark-routing new-routing-mark=proxy passthrough=yes
/ip/firewall/nat> /ip/firewall/nat/ add chain=srcnat action=masquerade src-address=10.0.0.0/24 dst-address=10.0.0.2/ip/firewall/nat/add chain=dstnat action=dst-nat dst-address=10.0.0.1 protocol=udp dst-port=53 src-address-list
=proxy_device to-addresses=10.0.0.2 to-ports=53 comment=proxy_dnsnat接下来确认dhcp 下发的dns只有v4,且为路由器10.0.0.1,如果不是的话需要修改。
然后点击 ip -> dhcp server -> lease 找到需要代理的设备,选中,点击make static,然后双击编辑,address list那里填上proxy_device即可
如果你配置了防火墙,需要添加一条accept规则,然后把该规则拖到最上面
/ip/firewall/filter/add chain=forward dst-address-list=proxy_cidr action=accept注意事项
chrome、edge浏览器,要关闭安全dns!!!
如果配置了ipv6,在ipv6 -> ND -> bridge 取消勾选:Advertise DNS
Smbox回家
- 点击设置页面
- 启用回家配置
- 填写ddns域名或者公网ip
- 填写端口
- 设置回家密码
- 点击保存
- 在路由器增加端口转发
- 用手机singbox扫码二维码,或者导入链接
ros 配置双smbox高可用
主smbox:10.0.0.2
次smbox:10.0.0.12
下方主次ip要改为你自己的!
简而言之就是,监听主smbox的8888端口,如果在运行就切换到主smbox,不在运行就切换到次的smbox。
打开tools -> netwatch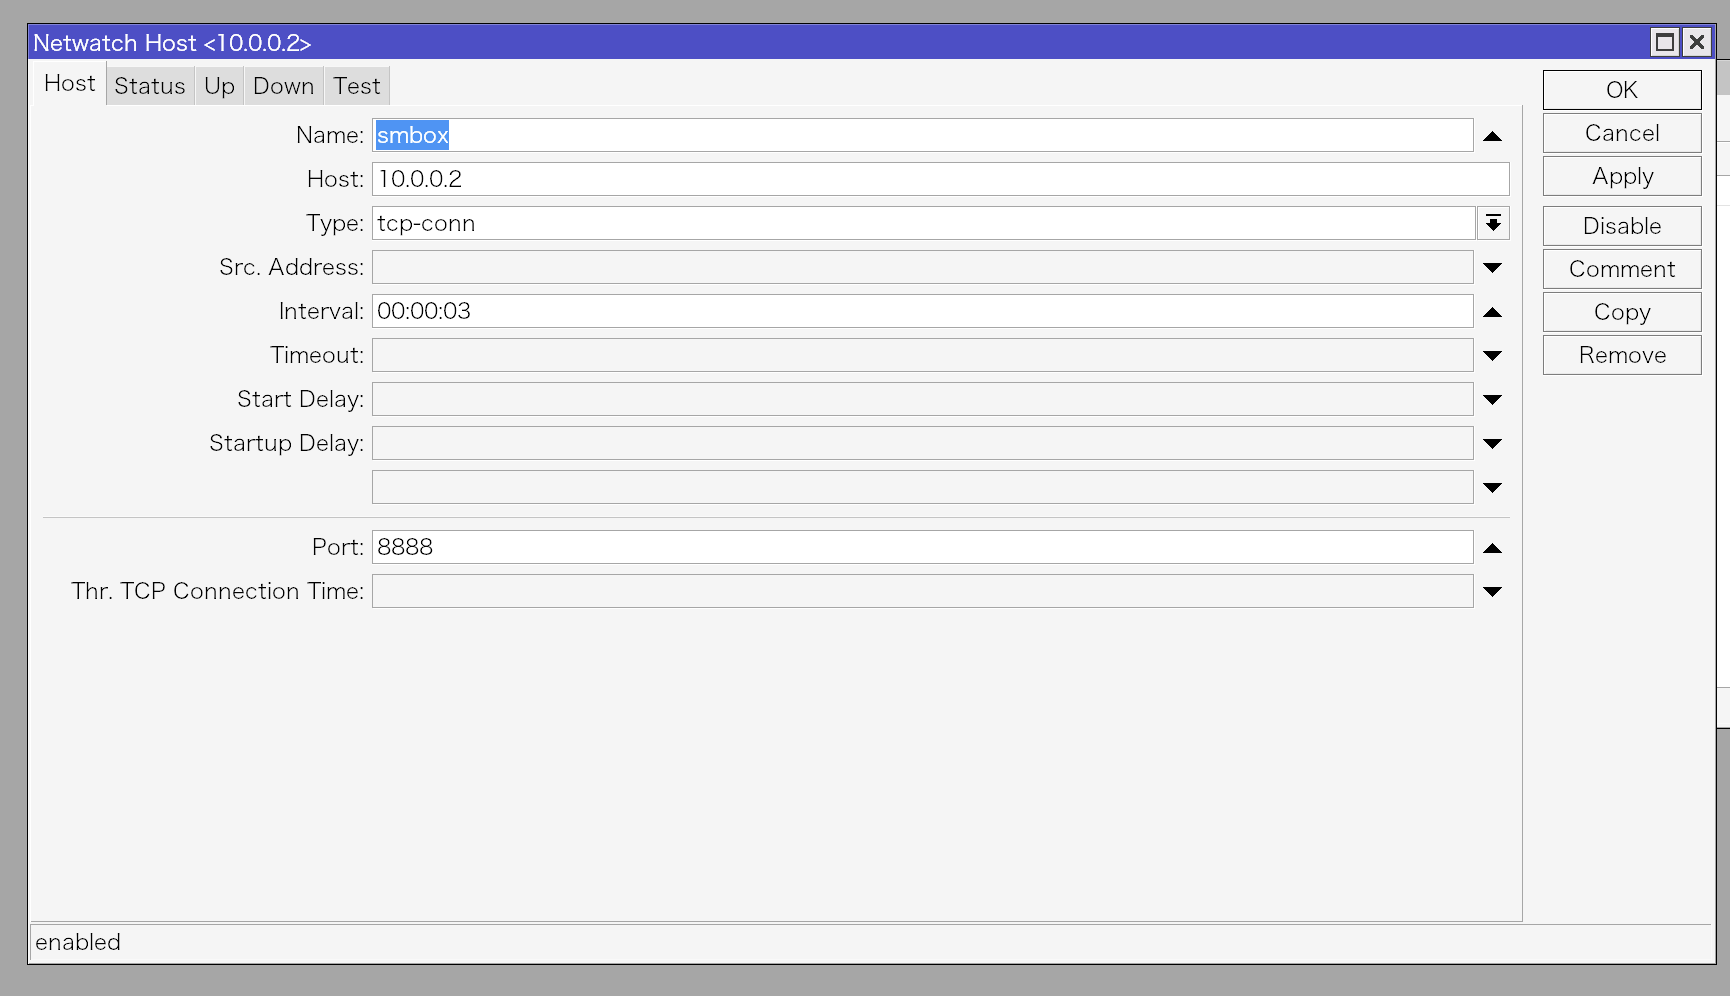
点击Up填入以下脚本
/ip/route/set [/ip/route/find comment="proxy_route"] gateway=10.0.0.2
/ip/firewall/nat/set [/ip/firewall/nat/find comment="proxy_dnsnat"] to-addresses=10.0.0.2
Down填入以下脚本
/ip/route/set [/ip/route/find comment="proxy_route"] gateway=10.0.0.12
/ip/firewall/nat/set [/ip/firewall/nat/find comment="proxy_dnsnat"] to-addresses=10.0.0.12
常见问题
singbox运行不起来
- ./sbdir/singbox run -D ./sbdir 看下报错日志
- 如果是 FATAL[0000] create service: parse outbound[0]: missing tags,说明所有过滤器皆没有命中
- 订阅请求400,多半是订阅链接被墙了,可以先浏览器打开,复制里面base64添加,等运行起来再换回url
本文由 不爱折腾 创作,采用 知识共享署名4.0 国际许可协议进行许可。
本站文章除注明转载/出处外,均为本站原创或翻译,转载前请务必署名。